50-Minute Classroom: Teaching Baking in 50 Minutes
28 July 2011By Adam Weiner, CFSE
 Chef Weiner suggests five steps to help students overcome their reticence toward baking.
Teaching baking in 50 minutes has some unique challenges. But it is more challenging to realize that we are teaching a generation who have not only grown up without seeing their parents bake from scratch, but have also grown up not seeing their grandparents bake from scratch. With Betty Crocker's first cake mix coming out in 1943, baking from scratch at home has become a lost art.
Fortunately, baking at home and in restaurants is making a comeback. However, we have to help our students overcome their shyness of baking. Here is a proposed 5-Step Program:
1. Start Simple and without Explanation. Divide your students into groups, give each group the same chocolate-chip-cookie recipe, and have them go at it. Stand back and don't get involved. Each group will produce a very different-looking and tasting cookie.
2. Explain What Happened. Tell the students that baking is not like cooking. Cooking is art, baking is science. (One of my dear friends taught me that “Cooking is a mistake; baking is science.”) Inform your students that bakers don't even call the instructions “recipes.” Since bakers are scientists in kitchens, they call them “formulas.” Tell the students that little deviations from the formula can change the end result.
3. Don't Monkey with Science. Explain that baking will only work if there is proper combination of ingredients, combined in a particular way, and cooked/baked exactly as directed. Cold butter versus softened butter versus melted butter versus shortening will all yield different results. Baking powder and baking soda are not the same thing, and cannot be substituted. Explain why you don’t combine the wet and dry ingredients until called for in the recipe, and why you need to get your product into the oven as soon as possible unless the formula has a rest or rise period.
To emphasize the point, I tell my students that if the formula calls for spinning once to the left and shaking hands with the person on your right, that you can't spin twice to the right and high-five the student to the left. I explain that if you do that, the product won't come out right. I then do each of these two maneuvers, and whip out a flattened cake that I have made for this purpose.
4. Measuring. You have to show students how to measure—properly. They almost assuredly did not grow up seeing it done. Explain the difference between a liquid measuring cup and a solid. Teach them the unwritten rules of baking measurements, which are assumed in every baking recipe. For example, you must sift flour before it is measured. You must tightly pack brown sugar into the cup to measure it. The same with shortening (if using a solid measuring cup). Show how to read the meniscus (the curve liquid will make) in a liquid cup. Show how to level off a teaspoon and a measuring cup.
This seems basic to you and me, but most of your students won't know how to do these things. Finally, show them how to weigh ingredients (don't forget teaching about tare weights) and WHY you measure by weight when baking. To do this I have each student bring me a cup of flour. (Do this before you teach leveling off.) Then, weigh each. I have had everything from under 2 ounces to over 16!
5. Carryover Heat. Remind students that in baking, like cooking, carryover heat can kill their dish. I tell students that if their baked goods look done in the oven, it will be burnt by the time it cools.
Now, give your students something they probably have never baked, but can do quickly. I start with muffins, and then scones. I like scones because, to students, these seem high-end and special. Yet the ingredients are inexpensive, and scones can be made as fast as chocolate-chip cookies. Here is an easy scone recipe I created:
Scones (Berry)
Yield: 16 scones (approximate)
3 cups all-purpose flour
½ teaspoon baking soda
2 teaspoons cream of tartar
½ cup butter, softened
½ cup sugar
1 cup washed and dried berries (any type, but cut large berries such as strawberries or blackberries in half)
¼ cup milk
¼ cup water
1 egg, beaten
Preheat convection oven to 350°F, regular oven to 400°F.
Sift flour, baking soda and cream of tartar into medium-size bowl. Work in butter a little at a time with your fingers or using 2 butter knives in crisscross motion until you have the consistency of sand. Add sugar and blend thoroughly. Add in berries.
Combine milk and water in a separate bowl and then stir into the flour mixture. Press dough lightly into a 10 inch by 8 inch rectangle on a lightly floured cutting board. Cut into 1 inch by 3 inch triangles. You should have about 16 pieces.
Place on a piece of parchment paper on a baking sheet about 2 inches apart and brush the tops of each with the beaten egg.
Bake for about 10 minutes and check for doneness. Scones are done when lightly brown. If they are not done, then rotate the pan and change shelves and check in 5 minutes.
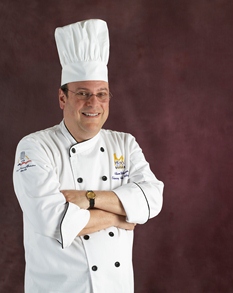
Chef Adam Weiner, CFSE, teaches a 20-week Introduction to Cooking program for JobTrain on the San Francisco Peninsula.
