Elevating Students’ Cooking Techniques
30 September 2016The often overlooked or underappreciated art of braising gives students a new tool that will serve them well, long after class is over.
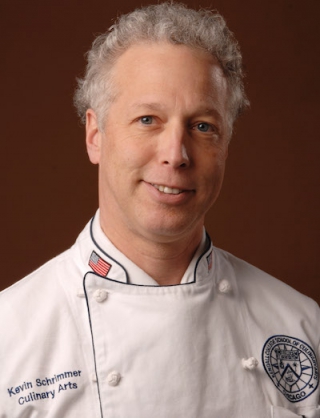
By Kevin Schrimmer, CHE, and Kendall College chef instructor
At Kendall College in our Advanced Skills course, instructors present students with a list of ingredients and ask them to prepare and execute a three-course menu in a prescribed amount of time. Although they know which ingredients are coming—it’s not a mystery basket—they need to know how to prepare and cook a meal that elevates the ingredients.
Some of my favorite student creations come from braising. If they are given an inexpensive piece of meat, like a cut from the shoulder or the hind quarter of beef, braising is an excellent option. This technique demonstrates a chef’s skills and transforms the cut into a superb dish.
When I review braising with students in a course earlier in the curriculum, it’s the first time they are introduced to a combination cooking method. Roasting, broiling, grilling, searing and sautéing are straightforward, single-stage cooking methods. Braising is almost like a science experiment. It’s a technique that helps them begin to realize how much creative control they have in a kitchen.
The process begins by marinating the meat, which allows the acid (wine or vinegar) to start to break down the collagen in the meat. That flavor also permeates the flesh.
A few hours or a full day later, the cut is dried off and a pan is prepared. Braising truly begins with searing in a pan set to high heat with very little fat. The goal is to have a crust to cover the cut on all sides. This is where students begin to build flavor, through the Maillard reaction (browning reaction).
Next, by removing the meat and adding aromatics, like onions, carrots, celery and fresh herbs, students are building the body of the sauce. The vegetables add color and more acid, and nuance to the overall dish.
Once the vegetables have browned, students return the meat to the pan and add stock, typically a veal stock, using a quantity that fills the pan no more than half or two-thirds. The choice of pan is crucial: The meat should cover about two thirds of the surface area, which will ensure that the liquid added won’t evaporate too quickly or too slowly, allowing the meat to slowly break down and tenderize.
On the stove top, after bringing the contents to a boil, students lower it to a simmer, cover, and put it in a 325-degree oven. You want to maintain a gentle simmer. It should never boil. Simmering allows the meat’s collagen to break down and release gelatins, which will be the base for the sauce—the artistry of a good braise.
There’s one more ingredient needed for this recipe: patience. Share with your students why time is essential and remind them their efforts will be rewarded. After two or three hours, check the meat (no thermometer is needed). If it’s finished, it will be tender and fall apart easily. Meat braised well should be as easy to cut as softened butter.
Braising is a cooking method that harkens back to comfort food and family recipes. Because it combines searing and simmering, using dry and moist heat, it can turn inexpensive cuts into a wonderful dish. It also helps students realize that although they’ve learned the basics, the techniques they choose to combine can elevate their cooking. It may also instill a sense of curiosity that will help them continue to produce creative, technically sound dishes for years.
Kevin Schrimmer, CHE, is the former chef-owner of Mimosa and a chef instructor at the School of Culinary Arts at Kendall College.
Photo courtesy of Kendall College